Skip to content
Addonify

Addonify

Documentation & knowledge based site

  • Docs
    • Quick View
    • Compare Products
    • Floating Cart
    • EDD 2Checkout Inline Gateway
  • Plugins
  • Themes
  • Support
  • Blog
Addonify store
  • Docs
    • Quick View
    • Compare Products
    • Floating Cart
    • EDD 2Checkout Inline Gateway
  • Plugins
  • Themes
  • Support
  • Blog

Getting started [2]

  • Installation
  • Access Setting Page

Developer [4]

  • Using Hooks
  • Overwriting Templates
  • Useful Functions
  • Custom Add to Wishlist Button

Support [2]

  • Support & Discussion
  • Dealing with the cache plugins
  • Home
  • Kb
  • WooCommerce Wishlist
  • Getting started
  • Access Setting Page

Access Setting Page

  • Updated on: July 29, 2022

Once Addonify Wishlist is activated, on your WordPress dashboard menu, you’ll find Addonify. If there is not any submenu under Addonify, click on Addonify to access the plugin’s setting page. If there is a submenu, click on Wishlist to access the plugin’s setting page.
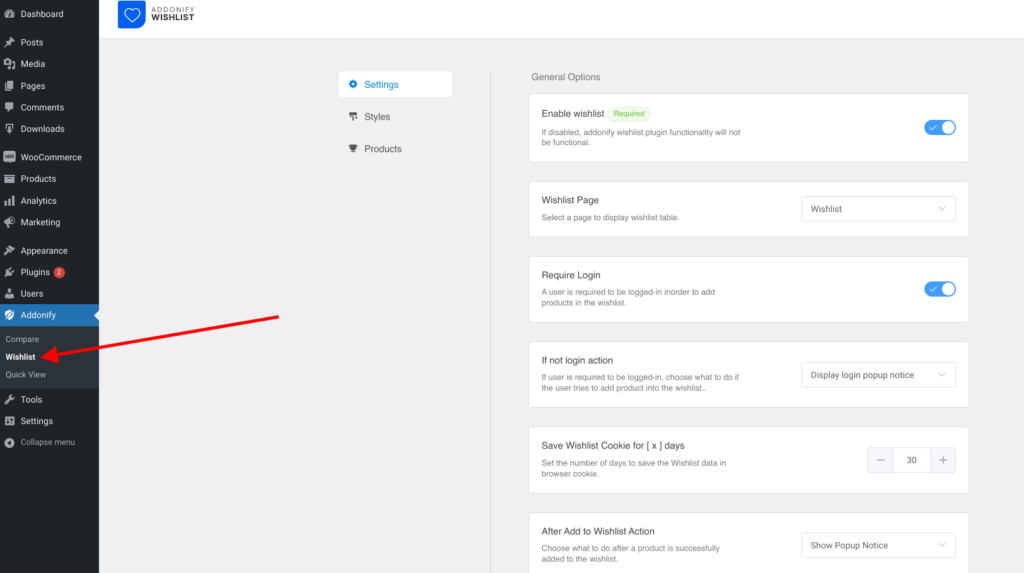
Fig: Addonify menu label on WordPress dashboard.

Once you are inside the Addonify Wishlist plugin setting page, as shown in the above image you will find 3 sub-pages:

  • Settings
  • Styles
  • Products

Settings

Settings include all the settings related to the wishlist button, wishlist sidebar modal, and button action’s popup modal. You can configure the settings & click the Save Options button at the top right corner to save your changes.

Styles

Styles include all the designs as well as color options. You can change the way how the wishlist components will appear on the front end of a website.

Products

We plan to use this page for marketing purposes. We will recommend other products made by us.

Didn't find what you looking for? Try sending your questions from our contact page.

Your feedback matters to us. Was this article helpful to you?

Copyright © 2022 addonify.com. All rights reserved.

Project by 💖 CreamCode.Org